Zero to Director #2 — Your First Carve: Text-to-Image with ZImage Turbo

Last post you learned what happens when someone clicks Queue: a blueprint gets read, a raw block gets marked with grain, and a carver makes repeated passes until the block resembles the blueprint. Today you are the someone. By the end of this post you will have built the entire text-to-image line — ten nodes, five stations — and pressed Queue yourself.
Everything below runs on the same files this series ships. Nothing is hand-waved: every node count, every dial value, every filename is taken from the workflow you will open.
From Concept to Canvas
Here is the whole Act I line in one breath:
Five stations. Text goes in at Condition, a finished image drops out at Save, and the three stations around them exist to make that possible. On the canvas they share four color-coded blocks — the blank block sits with the loaders, decode sits with save — but the line itself has five stations, and that is the count that matters. The rest of this post walks the line station by station, then teaches you to read the carver's dials.
Why ZImage Turbo
This series generates images with Z-Image Turbo for a simple reason: it is a distilled model, and distilled models need few strokes. Where a standard sampler might take dozens of passes, Turbo is trained to finish in about eight. Fewer strokes means faster experiments, and fast experiments are how you actually learn this machine.
Two practical facts about the weights on this machine:
- The full-precision build is
z_image_turbo_bf16.safetensors, about 12 GB on disk. That is larger than 8 GB of VRAM, and that is fine — ComfyUI automatically swaps what does not fit. First run after a fresh load is slower; that is the swap, not a fault. - A quantized build (
z_image_int8_convrot.safetensors) sits next to it as a fallback if you are ever squeezed for memory. This series uses the full build; the fallback is there if you need it.
The Ten Nodes
Open base.json and count with me. Ten nodes, five stations, sitting in four color-coded canvas groups.
| Station | Nodes | What it does |
|---|---|---|
| Load | 3 | Brings the three model files onto the line |
| Condition | 2 | Turns your prompt into instructions the carver speaks natively |
| Sample | 3 | Prepares the block and carves it |
| Decode | 1 | Translates the carved latent back into pixels |
| Save | 1 | Writes the PNG to disk |
Load — the readers
Three loader nodes, one per file, no settings beyond the filenames:
CLIPLoaderreadsqwen_3_4b.safetensorswith typelumina2. This is the translator: the part that reads your prompt.VAELoaderreadsae.safetensors, the 16-channel VAE. This is the workshop's compression room — the 12× squeeze you met in post #1.UNETLoaderreadsz_image_turbo_bf16.safetensors. This is the carver itself.
A loader's only job is to say "this file, this station." When a workflow refuses to run, check loaders first: a typo'd filename here is the most common break in any graph.
Condition — blueprint in
Two nodes, and the second one surprises people:
CLIPTextEncodetakes your prompt text and encodes it into the vector instructions the carver follows. This is the blueprint desk.ConditioningZeroOuttakes a second conditioning signal and zeroes it. That is the negative prompt slot — deliberately empty.
Turbo is distilled to run at force 1, where a negative prompt has nothing to push against — so the graph feeds the sampler a zeroed signal instead of a real one. There is no box to type a negative prompt into, because for this model it would do nothing. When you see tutorials build elaborate negative prompts for distilled models, that is cargo cult wiring.
Sample — prepare and carve
Three nodes doing the actual work:
EmptySD3LatentImageis the blank block: width, height, batch size.base.jsonships 1024×1024.ModelSamplingAuraFlowsits between loader and sampler withshiftat 3. One knob, one sentence: it tunes how the noise schedule is spaced. Leave it at 3 unless a recipe tells you otherwise.KSampleris the carver's console — five dials, which is the entire next section.
Decode — the casting
VAEDecode runs the compressed latent back through the VAE to produce real pixels — the casting step you met in post #1.
Save — pixels out
SaveImage writes them under the z2d/ prefix, so every file this workflow produces is recognizable in your output folder at a glance.
That is the whole line.
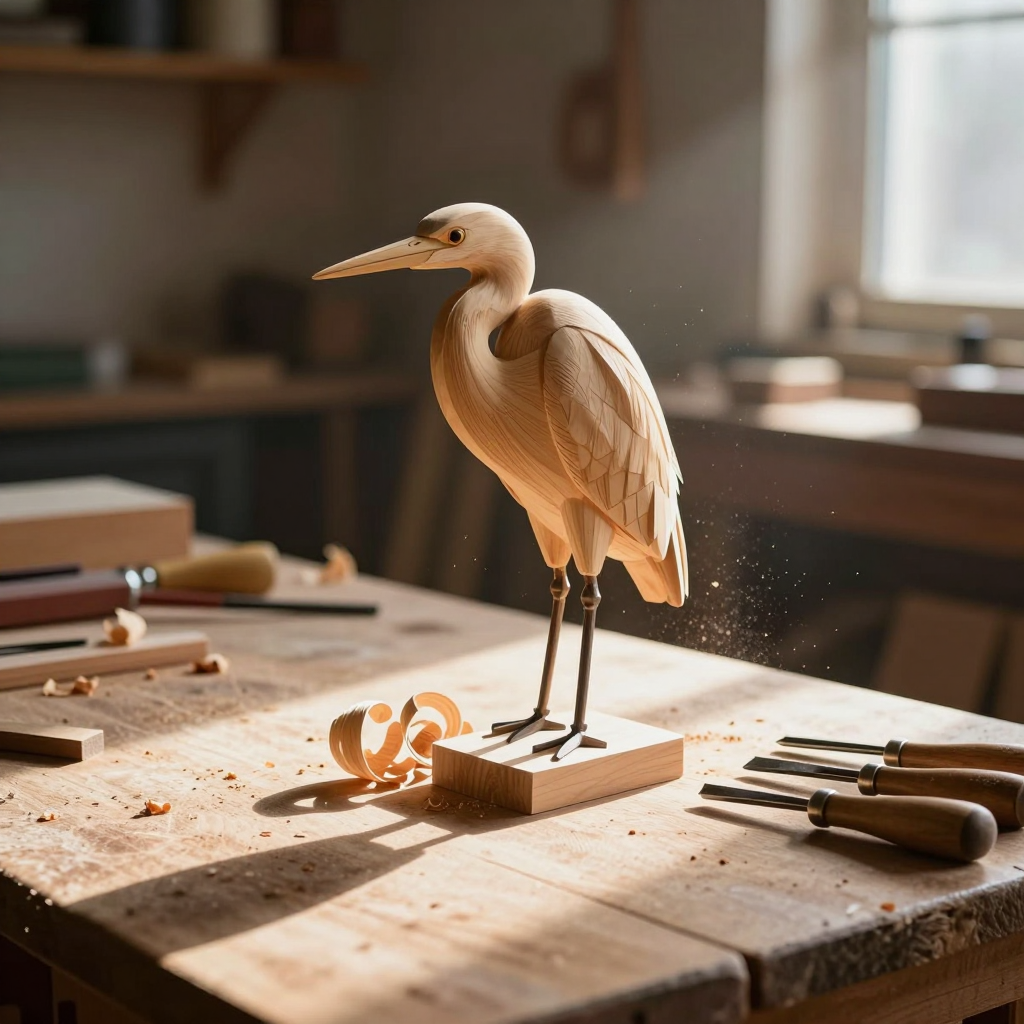
That image above is the actual first run of this exact file — prompt and seed as shipped, nothing cherry-picked.
Reading the Dials
The KSampler exposes five dials. Each one maps onto the metaphor you already own, and knowing the mapping is the difference between steering and gambling.
| Dial | Canon name | What it really controls |
|---|---|---|
seed | grain | Which raw block you start from |
steps | stroke count | How many passes the carver makes |
cfg | force | How hard the chisel follows the blueprint |
sampler + scheduler | stroke order | The choreography of those passes |
denoise | — | How much of an existing carving to keep |
Seed is grain. Same seed, same prompt, same everything else: the same image comes out — the rerun test in the strip below proves it. Change only the seed and you keep the blueprint but start from different wood.
Steps are strokes. Every step is one more pass of refinement — coarse shapes first, fine surfaces last. Turbo finishes around eight; the quartet experiment from post #1 shows the same carving at one, two, four, and eight.
CFG is force. One means the carver follows the blueprint with a light, confident hand. Distilled models are trained at force 1–2; pushing higher does not add obedience, it adds burn. This graph ships at 1.
Sampler and scheduler are stroke order. res_multistep with simple is the shipped pair. There are other valid pairs, but they are taste, not truth — change them when a specific recipe asks, not to cure boredom.
Denoise is post #3's dial. At 1.0 you always start from a fresh block. Below that, you keep part of an existing carving — which is the entire subject of the next post.
Examples — Same Grain, New Blueprint
The series' second teaching workflow, 02-same-hero.json, carves the same subject three ways:
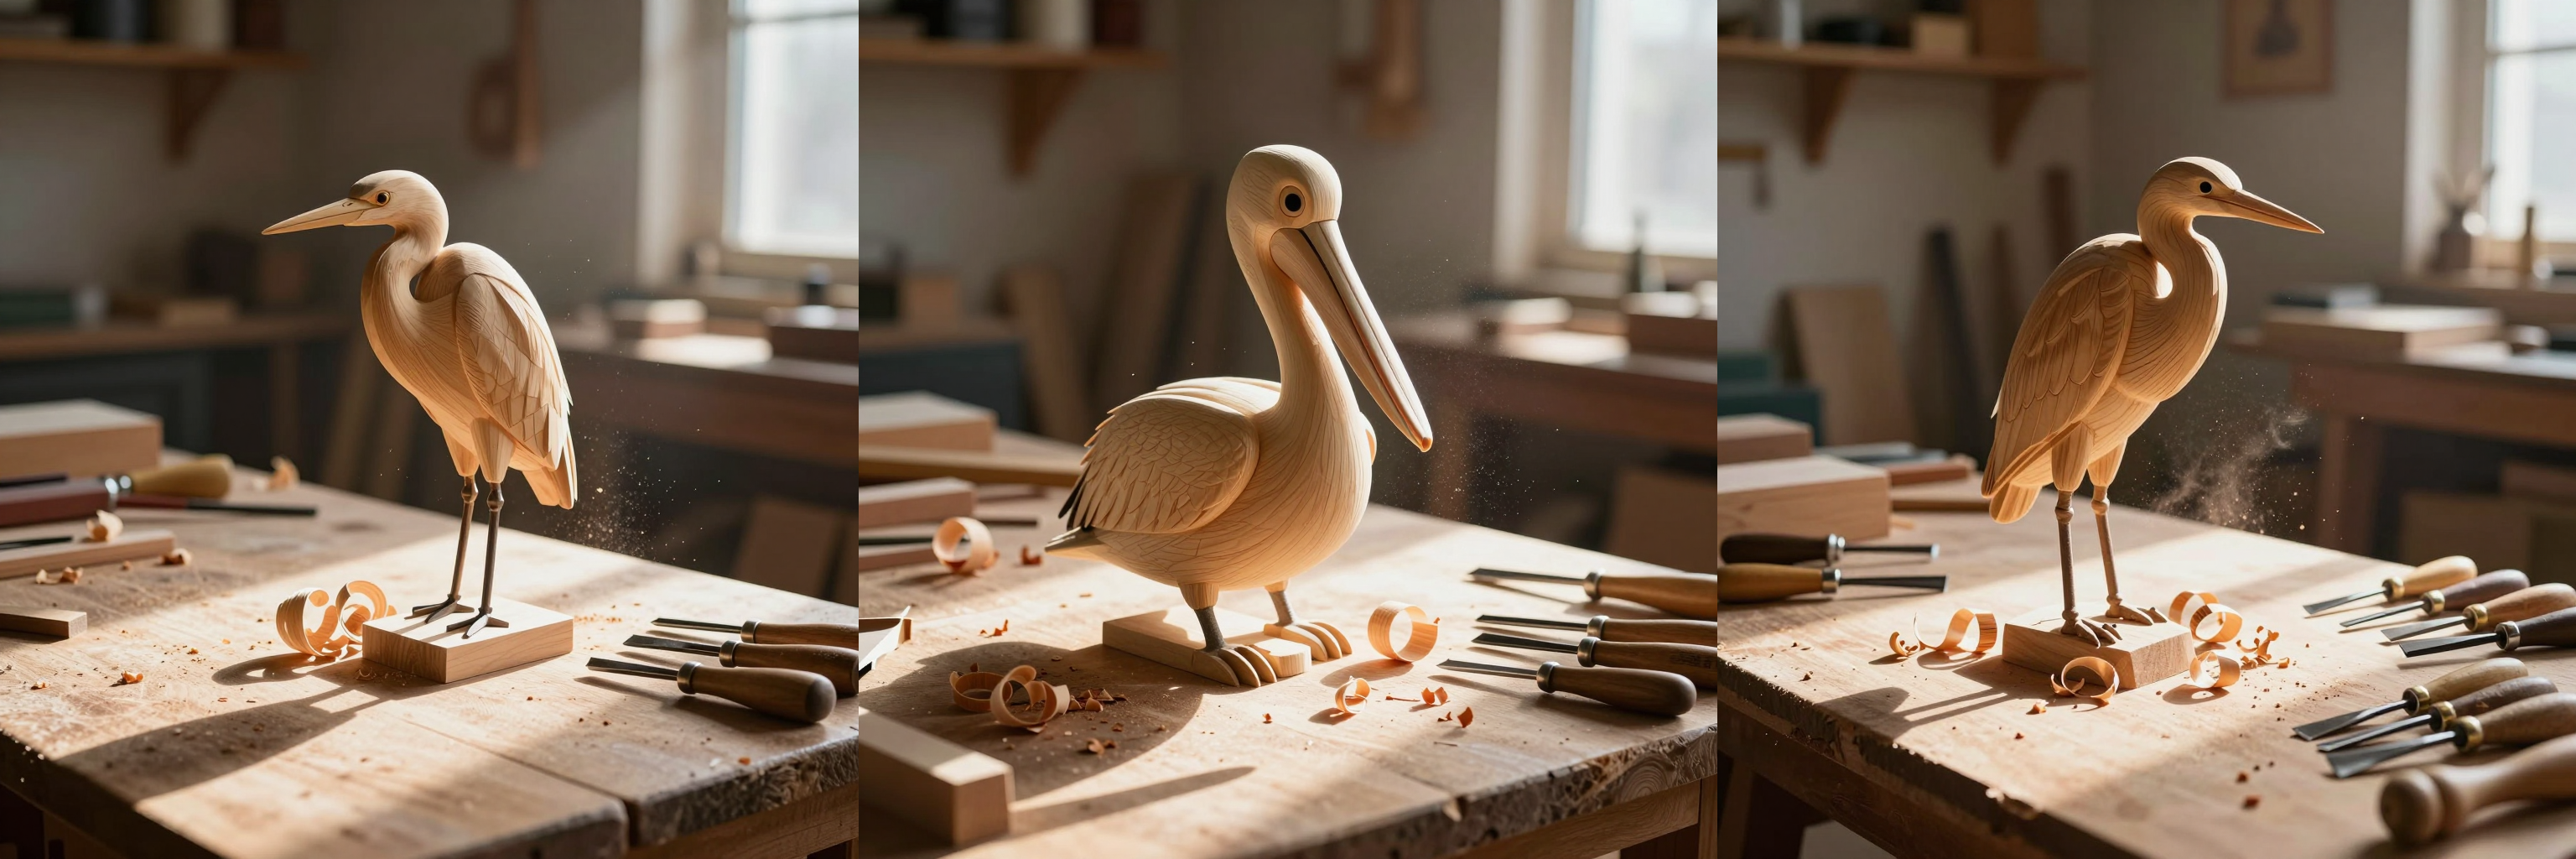
- Left — rerun. Same prompt, same seed. The carving is the same image again: determinism is real, and "I lost my seed" is how you lose a good image forever.
- Middle — reworded. One word of the prompt changed, seed untouched. Same wood, visibly different carving: the blueprint is the stronger lever when you want a different picture.
- Right — reseeded. Prompt untouched, new seed. Same subject, different character: the grain lottery.
Read left to right and you have the whole mental model: blueprint controls subject, grain controls character, strokes control finish. Every image decision you will ever make in Act I is some mix of those three.
Pitfalls
- Cranking CFG. The single most common import from older tutorials. On distilled Turbo, force above 2 does not sharpen obedience — it scorches surfaces. Ship 1, touch 2 at most.
- Hunting for a negative-prompt box. There is none. The graph zeroes the slot on purpose. Do not add one.
- Turning every dial at once. A result you cannot explain teaches nothing. Change one dial per run — that is how every experiment in this series was built.
- Seed-chasing as a workflow. Rerolling seeds on a weak prompt is grain lottery. Fix the blueprint first; the grain will meet you halfway.
- Panicking at the slow first run. 12 GB of weights on 8 GB of VRAM means swapping. The pause after Queue on a fresh load is the swap working, not the graph hanging.
Your Move
Open base.json and run it once, exactly as shipped — you now know what every node on that canvas is for.
Then the drill: change one word of the prompt, queue, and predict which way the image moves before you look.
Do that until your predictions stop being wrong.
When one dial at a time feels slow, you are ready for post #3: keeping the block, changing part of the carving — image-to-image, where denoise finally earns its dial.