Zero to Director #3 — Carving From a Photo: Image-to-Image with ZImage

From Last Time
Post #2 ended with a complete text-to-image line: ten nodes, five stations, a blank 1024 by 1024 block, and one carved heron. Every carve started from nothing — the carver alone decided the composition.
This post changes exactly one thing: the blank block becomes a photograph.
Same models, same readers, same carver. The line gains a Source station, and one dial — denoise — becomes the whole game.
Why img2img
A blank block gives the model total freedom, which also means you total uncertainty about composition. A photograph is a block that already has a shape: the subject is placed, the light is set, the proportions are locked. Carving from it means deciding how much of that shape survives:
- You already carved a heron you like, but the wood grain feels wrong — recarve at low denoise and keep the composition.
- You have a product photo and want it in bronze — swap the blueprint, raise denoise.
- Your first carve is 80% right — carve it again, gentler, and again, gentler still.
That is image-to-image: start from structure you already have, and pull it toward the blueprint.
The New Nodes
Eleven nodes now — post #2's ten, minus EmptySD3LatentImage, plus two new ones that form the Source station.
The line now has six stations — Load, Source, Condition, Sample, Decode, Save — and the canvas shows five color-coded blocks: decode and save still share one, exactly as in post #2, while the new Source block takes the corner where the blank block used to sit.
Three stations now feed the carver: the readers bring it the skill, the blueprint tells it what to aim for, and the source hands it raw material that already has a shape.
Load — the readers
The same three loaders as post #2 — model, translator, caster. Nothing new here; the readers do not care what the block used to be.
Source — the photograph and the block
Two new nodes:
LoadImage— The photograph. Reads a file from ComfyUI'sinput/folder and puts real pixels on the line. Ours readsz2d-heron.png— post #2's first carve, saved and fed back in.VAEEncode— Photo to block. The casting step in reverse: pixels in, compressed latent out. This is the 12× squeeze from post #1 running backwards, and it uses the same caster —ae.safetensorsnow feeds both directions. One caster, two directions: encode to enter the workshop, decode to leave it.
Condition — blueprint in
Unchanged from post #2: one CLIPTextEncode for the prompt, one ConditioningZeroOut because Turbo runs at force 1 and needs no negative.
Sample — prepare and carve
ModelSamplingAuraFlow (shift 3) and the KSampler, same settings as post #2 — steps 8, force 1, res_multistep + simple.
A fresh grain and one moved dial: denoise, from 1.0 to 0.6.
That single number is the subject of this post.
Decode and Save — pixels out
The casting and the save, exactly as before, still writing under the z2d/ prefix.
Open base.json and count with me: eleven nodes, six stations, five color blocks.
The Denoise Dial
In post #2, denoise sat at 1.0 and you never touched it — carving from a blank block, the carver uses everything it has. With a photograph on the line, denoise decides how deep the recarve goes. Think of it in effective cuts:
effective cuts ≈ steps × denoise
At 8 steps, denoise 0.25 means the carver takes about two effective passes over your photo; denoise 0.75 means six. Few effective cuts leave the photograph mostly intact; many of them rewrite it toward the blueprint. A rough map, tuned for ZImage Turbo at 8 steps:
- 0.2 — a touch-up. Texture and color shift, structure frozen.
- 0.4 — a restyle. Materials and mood change, composition holds.
- 0.6 — a rebalance. This is where base.json ships: the photograph and the blueprint negotiate.
- 0.8 — a heavy rewrite. Layout survives, details come from the prompt.
- 1.0 — the photograph is ignored; you are back to text-to-image with extra steps.
The photograph is never directly edited — it is squeezed to a block, the carver recuts that block mixed with fresh grain, and the cast shows the result.
Examples
The redress
The teaching workflow 03-redress.json keeps the photograph, swaps the blueprint to a bronze sculpture in a sculptor's studio, and raises denoise to 0.75.
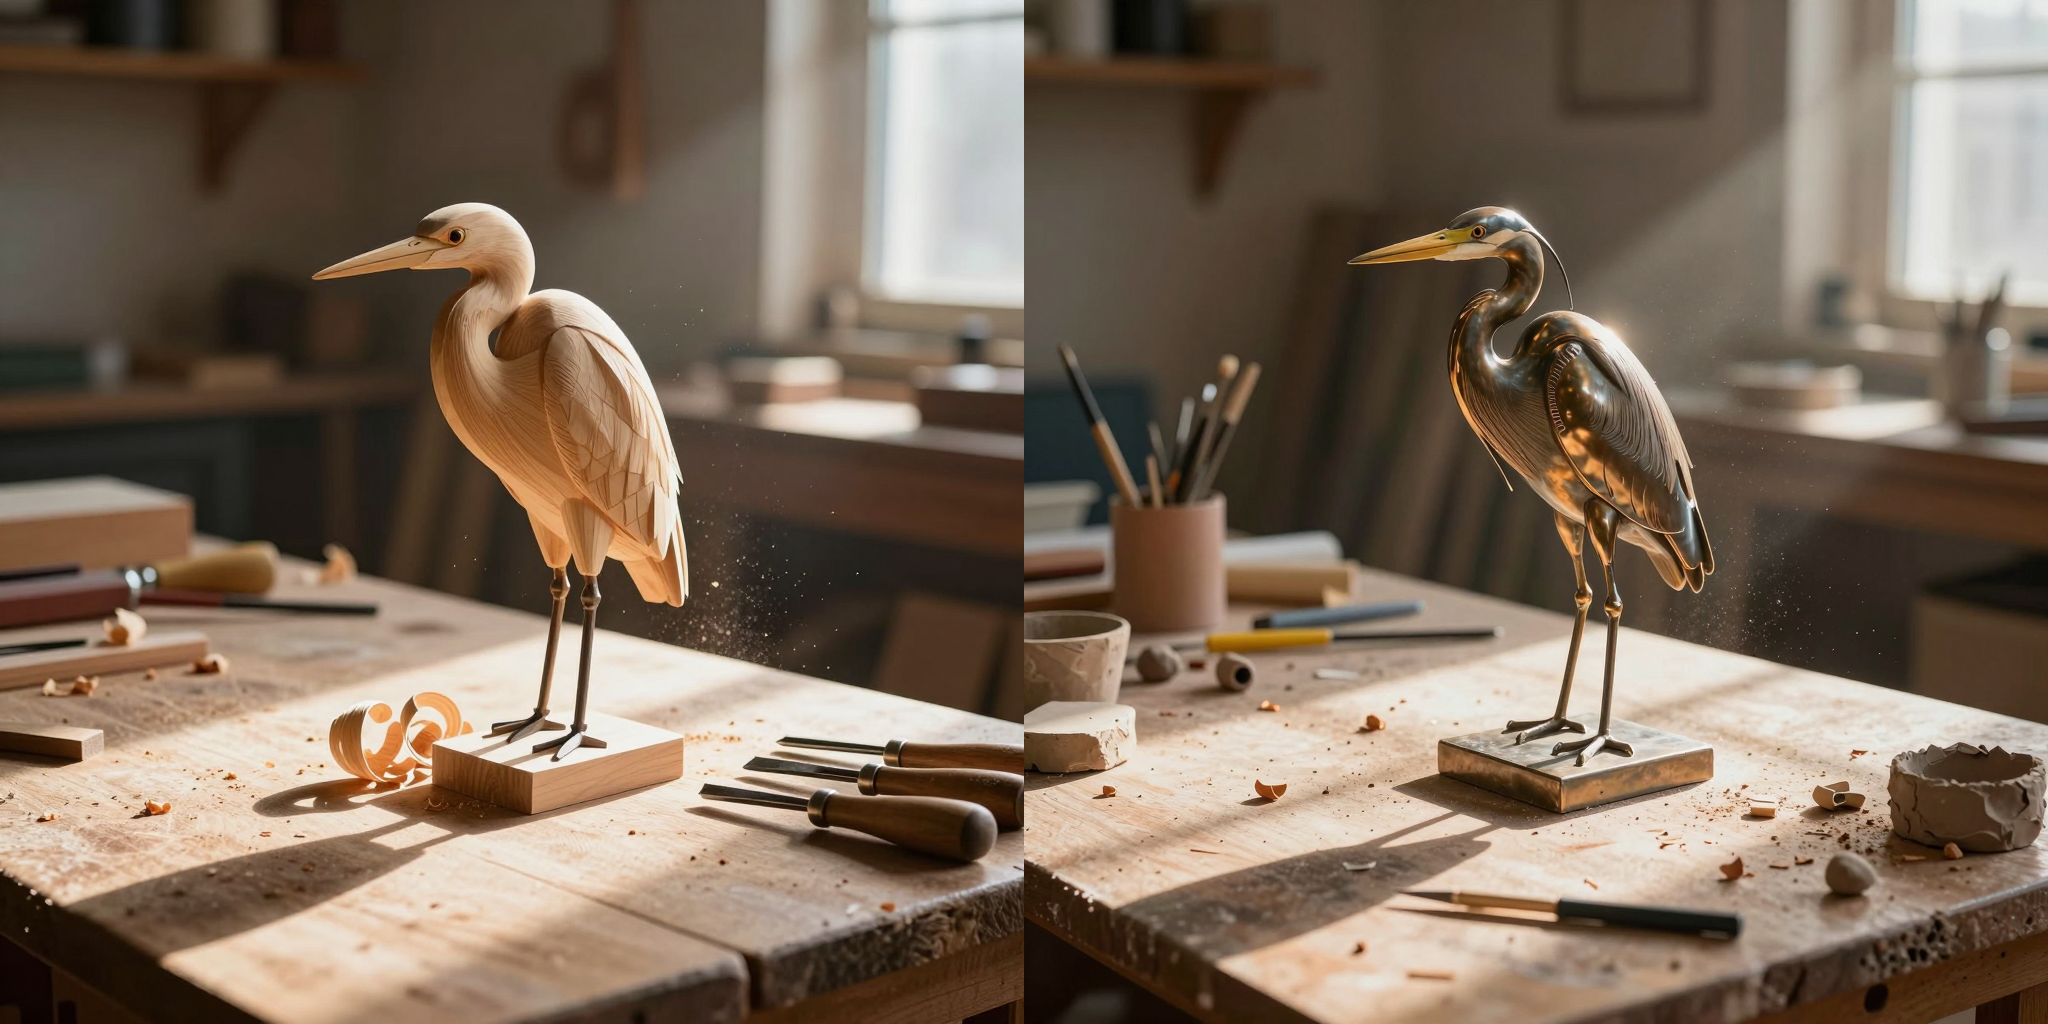
Measured against the photograph, the pair lands 16 dB apart — far too different for a filter, far too structurally alike (similarity 0.61) for a new composition. That is denoise 0.75 doing its job: the workbench, the pose, the sunbeam survive; the material answers to the blueprint. Watch the wood grain give way to polished metal while the layout holds — that negotiation is the whole dial in one image.
The preservation quartet
03-preservation-test.json runs the same photograph and blueprint through four carvers at denoise 0.2, 0.4, 0.6, and 0.8 — the i2i sibling of post #1's steps quartet.
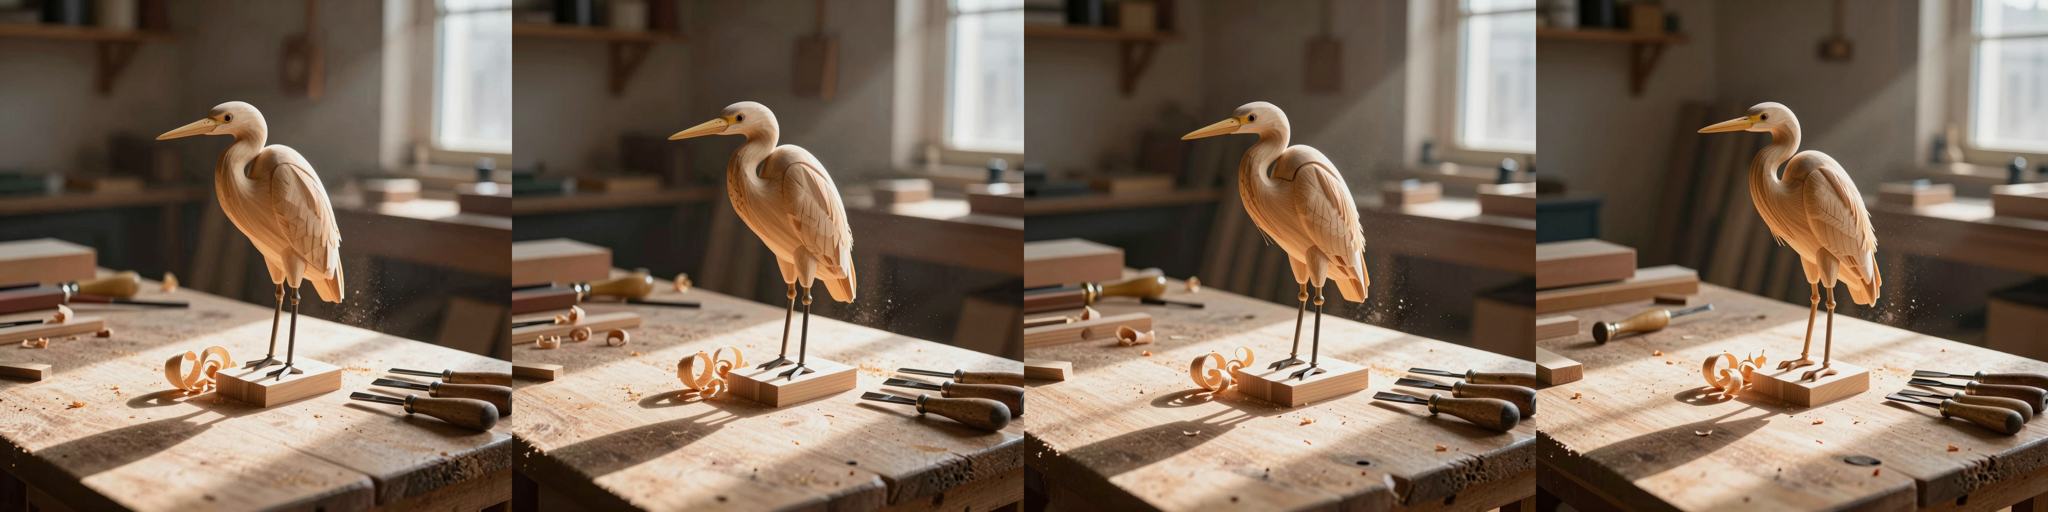
Measured against the photograph, every step up the dial lands the carve further from the source — no surprises, just a dial that does what it says:
| Denoise | Pixel distance | Structural similarity |
|---|---|---|
| 0.2 | 30.2 dB | 0.90 |
| 0.4 | 25.6 dB | 0.82 |
| 0.6 | 22.2 dB | 0.75 |
| 0.8 | 18.4 dB | 0.66 |
Pixel distance (PSNR) reads how much the surface changed; structural similarity reads how much of the layout survived. Both fall monotonically as denoise rises — texture first, then materials, then composition. Squint across the strip: at 0.2 you are still looking at your photograph; at 0.8 you are looking at where it used to be.
Three rounds, gentler each time
03-iterative-refine.json chains three rounds: carve at 0.8, cast, squeeze the result back to a block, carve again at 0.5, and once more at 0.3. Each round starts from pixels you have already seen — between rounds you could swap the photograph, edit it, or change the blueprint.
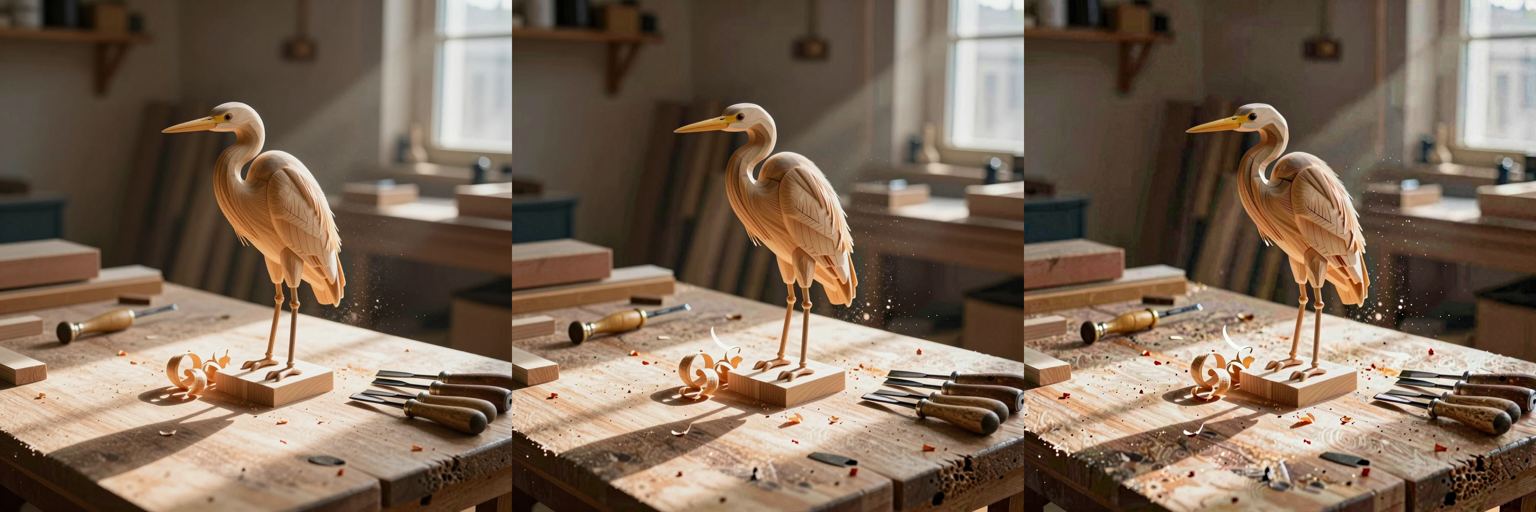
Round one is the quartet's 0.8 panel — pixel for pixel. Same photograph, same grain, same dial: the carver repeats itself exactly, and the two output files differ only in the workflow metadata embedded in their headers. That determinism is the whole trick: rounds two and three drift further from the original photograph with each pass (18.4, then 17.3, then 16.5 dB away) because every gentle recut compounds the last one. Watch detail settle across the three panels — rough shapes first, cleaner surfaces as the passes get gentler — and notice what does not happen: the composition never re-decides itself.
Pitfalls
- Denoise 1.0 wastes the photograph. The carver ignores the source entirely — you ran an encoder to feed a blank block. Drop to text-to-image or lower the dial.
- Too low is a no-op. At 8 steps, denoise 0.1 is under one effective cut — you pay a full roundtrip to look at your own photograph.
- Watch the source resolution. The caster expects the model's native square; photographs far from it get squeezed and distorted. Crop and resize near 1024 by 1024 before feeding the line.
- Every roundtrip loses a hair. Encode, carve, cast, re-encode — each pass softens the image slightly. Refine in few rounds; when you do not need to see the pixels between rounds, chain the carvers directly in latent space instead.
- Same grain, same photo, same carve. With the seed fixed, reruns are reproducible. Change the grain for variations; change denoise for depth. Changing both at once makes it hard to know which dial did what.
Your Move
Open base.json, drop a photograph of your own into input/, point LoadImage at it, and carve.
Then run the preservation quartet with your photograph and watch the dial map hold — the numbers stay honest only if you check them against your own material.